How to Delete Recording in Microsoft Teams: A Step-by-Step Guide
Microsoft Teams has become an essential tool for remote collaboration, meetings, and webinars. With its recording feature, you can easily capture important discussions and presentations. However, managing these recordings can be overwhelming. In this guide, we will walk you through the process of deleting recordings in Microsoft Teams. Whether you're cleaning up your storage, ensuring data privacy, or simply decluttering your account, we've got you covered.
1. Why Delete Teams Recordings
Before we dive into the steps, let's explore some reasons why you might want to delete your Microsoft Teams recordings:
1.1 Storage Management:
Over time, recorded meetings and webinars can consume a significant amount of storage space in your Teams account.
1.2 Data Privacy:
To comply with data privacy regulations, you may need to delete recordings containing sensitive information.
1.3 Content Cleanup:
As a content creator or meeting organizer, removing outdated recordings can help streamline your content library.
how to delete recording in teams
2. Locating Your Recordings
Before you can delete a recording, you need to find it. Here's how:
2.1 Open Teams:
Launch the Microsoft Teams app or visit the web version.
2.2 Navigate to the Appropriate Space:
Go to the team, channel, or chat where the meeting or webinar was held.
2.3 Click on "Files":
Within the channel or chat, click on the "Files" tab.
2.4 Search or Browse:
Use the search bar or browse through folders to locate your recording.
3. Deleting a Recording
Once you've found the recording you want to delete, follow these steps:
3.1 Select the Recording:
Click on the recording file to select it. It should be highlighted.
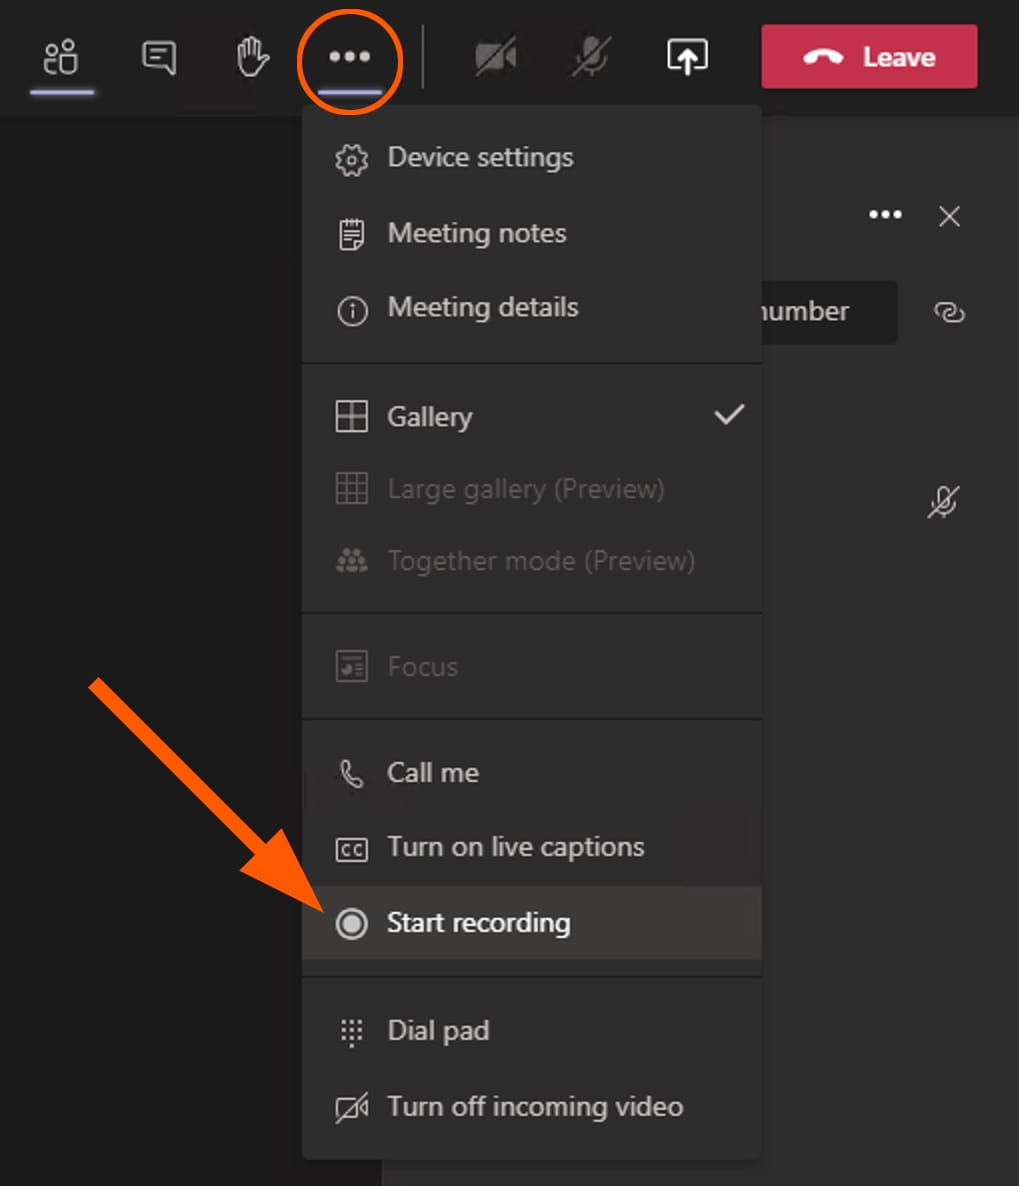
3.2 Open the Menu:
At the top of the Teams interface, you'll see a menu bar. Click on the ellipsis (...) icon.
3.3 Choose "Delete":
In the dropdown menu, select "Delete." A confirmation prompt will appear.
how to delete recording in teams
3.4 Confirm Deletion:
Confirm that you want to delete the recording. Be aware that this action is irreversible.
3.5 Empty Recycle Bin (Optional):
Deleted recordings are moved to the recycle bin. To permanently delete them, open the recycle bin and empty it.
4. Restoring Deleted Recordings
If you accidentally delete a recording or need to retrieve it, you can do so within a limited timeframe:
4.1 Go to the Recycle Bin:
Find the recycle bin in the Files tab of Teams.
4.2 Locate the Recording:
Search for the deleted recording in the recycle bin.
4.3 Restore:
Select the recording, click on the ellipsis icon, and choose "Restore" to return it to its original location.
5. Managing Recordings Efficiently
To maintain an organized and efficient recording library in Microsoft Teams, consider the following tips:
5.1 Regular Cleanup:
Schedule regular audits to delete unnecessary or outdated recordings.
5.2 Naming Conventions:
Use clear and consistent naming conventions for recordings to make them easy to identify.
5.3 Permissions:
Manage permissions to ensure that only authorized users can delete or access recordings.
5.4 Educate Users:
Educate your team members on the importance of responsible recording management.
Knowing how to delete recordings in Microsoft Teams is a valuable skill for managing your digital workspace efficiently. Whether it's about reclaiming storage, safeguarding data privacy, or maintaining a clutter-free account, the steps outlined in this guide will help you navigate the process with ease. Remember to exercise caution when deleting recordings, as the action is irreversible. By following best practices for recording management, you can make the most of Microsoft Teams' powerful collaboration features.