How to Remove Audio from Video in Sony Vegas Pro
Sony Vegas Pro is a versatile video editing software known for its powerful features and user-friendly interface. One common editing task is removing audio from a video clip, whether to eliminate background noise, replace it with another soundtrack, or create a mute video. In this guide, we'll walk you through the step-by-step process of removing audio from a video using Sony Vegas Pro, ensuring that your videos look and sound just the way you want them to.

Sony vegas pro remove audio from video
Step 1: Import Your Video
The first step in removing audio from a video in Sony Vegas Pro is to import your video clip.
Open the software, create a new project, and then drag and drop your video file into the timeline or the project media tab.
Step 2: Separate the Audio and Video Tracks
To remove the audio from your video, you'll need to separate the audio and video tracks.
Right-click on your video clip in the timeline and select "Ungroup." This action will split the video and audio portions into separate tracks.
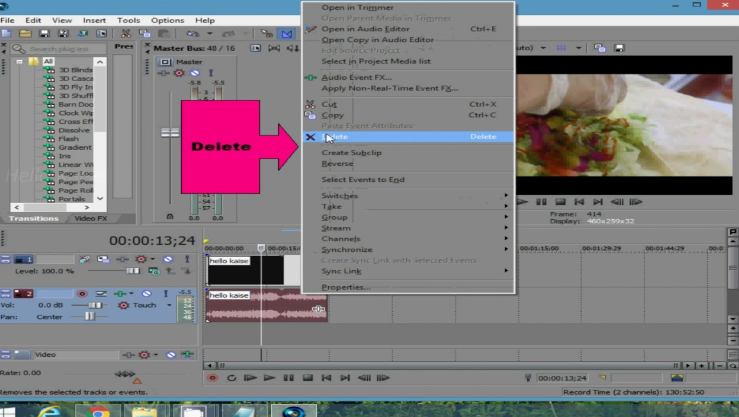
Step 3: Delete the Audio Track
With the audio and video tracks separated, select the audio track by clicking on it.
Then, press the "Delete" key on your keyboard or right-click on the audio track and choose "Delete." This action effectively removes the audio from your video.
Step 4: Confirm the Muted Video
To ensure that the audio has been successfully removed, play your video in the Sony Vegas Pro preview window.
You should hear no sound, confirming that the audio has been deleted.
Step 5: Save Your Edited Video
Once you're satisfied with the mute video, it's time to save your edited project. Go to "File" > "Render As" to export your video in your desired format. Make sure to choose an appropriate file format and settings before rendering your video.
Step 6: Finish and Share
After rendering, your video will be saved without any audio. Now, you can share it on social media, upload it to YouTube, or use it for any other purpose you had in mind.
Step 7: Additional Tips:
Backup Your Project: Before making any significant edits, it's a good practice to save a backup copy of your project. This way, you can revert to the original if needed.
Use the Mute Tool: Sony Vegas Pro also provides a "Mute" tool that you can use to mute specific sections of your audio track. This can be handy if you only want to remove certain parts of the audio.
Explore Audio Effects: If you need to replace the removed audio with a different soundtrack or background music, Sony Vegas Pro offers various audio effects and editing tools to enhance your video's audio quality.

Sony Vegas Pro is a versatile video editing software
Removing audio from a video in Sony Vegas Pro is a straightforward process that can improve the overall quality and appeal of your video content. Whether you're eliminating unwanted noise or preparing your video for a voiceover or new soundtrack, following these steps will help you achieve the desired result. Sony Vegas Pro's intuitive interface and robust editing capabilities make it a powerful tool for video creators and editors.