How to Make a Horizontal Picture Vertical: A Step-by-Step Guide
Sometimes you may have a horizontal picture that you want to use in a vertical orientation for a specific project or to fit a particular display format. Fortunately, transforming a horizontal picture into a vertical one is a simple process that can be done using various software and online tools. In this article, we will provide you with a step-by-step guide on how to make a horizontal picture vertical. Whether you're a photographer, designer, or simply looking to modify an image, this guide will help you achieve the desired result. Let's get started!

Vertical Horizontal Having Five Lines Of Different Color
1. Understanding Horizontal and Vertical Orientation:
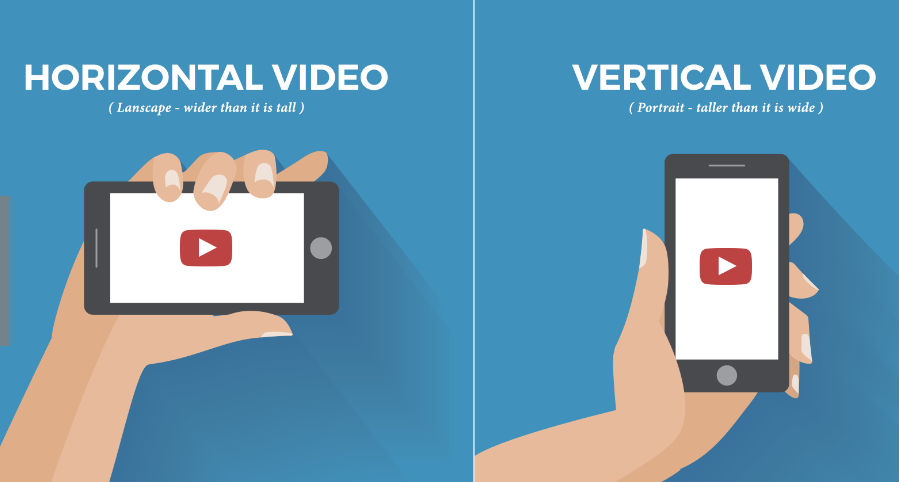
a. Horizontal Picture: A horizontal picture has a wider width than height, often referred to as landscape orientation.
b. Vertical Picture: A vertical picture has a taller height than width, commonly known as portrait orientation.
2. Using Image Editing Software:
a. Adobe Photoshop:
- Open the Image: Launch Adobe Photoshop and open the horizontal picture you want to make vertical.
- Crop Tool: Select the Crop tool from the toolbar or press the C key to activate it.
- Adjust Crop Orientation: In the options bar, click on the drop-down menu next to "Aspect Ratio" and choose "Vertical" or "Custom." Alternatively, manually adjust the crop handles to the desired vertical aspect ratio.
- Crop the Image: Click and drag the crop handles to select the portion of the image you want to keep in the vertical orientation. Press Enter or click the checkmark icon to apply the crop.
- Save the Edited Image: Once you are satisfied with the vertical orientation, save the edited image in your preferred format.
b. GIMP (GNU Image Manipulation Program):
- Open the Image: Launch GIMP and open the horizontal picture you wish to make vertical.
- Crop Tool: Select the Crop tool from the toolbox or press the Shift+C key combination to activate it.
- Adjust Crop Orientation: In the Crop tool options, select the "Fixed" aspect ratio and choose a vertical ratio such as "1:2" or "2:3" to maintain the desired vertical orientation.
- Crop the Image: Click and drag the crop handles to select the portion of the image you want to keep in the vertical orientation. Press Enter to apply the crop.
- Save the Edited Image: After cropping, save the edited image in your preferred file format.
3. Using Online Image Editing Tools:
Pixlr Editor:
- Upload the Image: Visit the Pixlr Editor website and upload the horizontal picture you want to make vertical.
- Crop Tool: Select the Crop tool from the toolbar.
- Adjust Crop Orientation: In the options panel, enter the desired vertical dimensions for the crop or manually adjust the crop handles to create a vertical aspect ratio.
- Crop the Image: Click and drag the crop handles to select the portion of the image you want to keep in the vertical orientation. Click "Apply" to finalize the crop.
- Download the Edited Image: Once you are satisfied with the vertical orientation, click "File" > "Save" to download the edited image to your computer.
4. Using Smartphone Apps:
Snapseed (iOS/Android):
- Open the App: Install the Snapseed app on your smartphone and open it.
- Import the Image: Tap the "+" button to import the horizontal picture you wish to make vertical.
- Crop Tool: Select the Crop tool from the list of editing tools.
- Adjust Crop Orientation: In the aspect ratio options, choose a vertical ratio or manually adjust the crop handles to create a vertical aspect ratio.
- Crop the Image: Drag the crop handles to select the portion of the image you want to keep in the vertical orientation. Tap the checkmark icon to apply the crop. vi. Save the Edited Image: After cropping, save the edited image to your device's gallery.
5. Preserving Image Quality:
When making a horizontal picture vertical, ensure that the resolution and image quality are preserved. Avoid excessive cropping or stretching that may result in a loss of quality.
6. Additional Editing Options:
a. Adjustments and Enhancements: While making a horizontal picture vertical, you can also explore additional editing options to enhance the image, such as adjusting brightness, contrast, or applying filters.
b. Retouching: If needed, use retouching tools to remove any unwanted elements or distractions from the image.

Make a Horizontal Video Vertical
Transforming a horizontal picture into a vertical orientation is a straightforward process that can be accomplished using image editing software, online tools, or smartphone apps. By following the step-by-step guide provided in this article, you can easily make a horizontal picture vertical to fit specific requirements or creative preferences. Whether you choose to use Adobe Photoshop, GIMP, online image editing tools like Pixlr Editor, or smartphone apps like Snapseed, the result will be a visually appealing vertical image. Remember to preserve image quality and explore additional editing options if desired. Enjoy the flexibility and creative possibilities of transforming horizontal pictures into captivating vertical compositions!