How to Connect a VCR to a Smart TV: A Step-by-Step Guide
In today's technologically advanced world, Smart TVs have become a staple in many households, offering a wide range of entertainment options. However, many people still have a treasure trove of nostalgic VHS tapes that they want to watch. Connecting a VCR to a Smart TV may seem like a daunting task, but fear not! In this comprehensive guide, we will walk you through the process step by step, ensuring a seamless connection and a trip down memory lane. So, dust off that VCR and let's get started!
I. Understanding the Basics
Before diving into the connection process, it's essential to understand the basics of both VCRs and Smart TVs. A VCR (Video Cassette Recorder) is an analog device used to play and record video tapes.
VCR (Video Cassette Recorder)
On the other hand, a Smart TV is a modern television that can connect to the internet and offer various streaming services and apps.
II. Assessing Your Devices
First, make sure you have the necessary equipment. Check if your Smart TV has the required ports to connect a VCR. Most Smart TVs have HDMI, composite, or component ports that can be used for this purpose. Similarly, examine your VCR and ensure it has compatible output options, such as HDMI, composite, or component.
III. Connecting with HDMI
If your Smart TV and VCR both have HDMI ports, this is the easiest and highest quality option. Simply connect one end of the HDMI cable to the HDMI output of the VCR and the other end to an available HDMI input on your Smart TV. Once connected, use your Smart TV remote to select the corresponding HDMI input source.
Connecting with HDMI
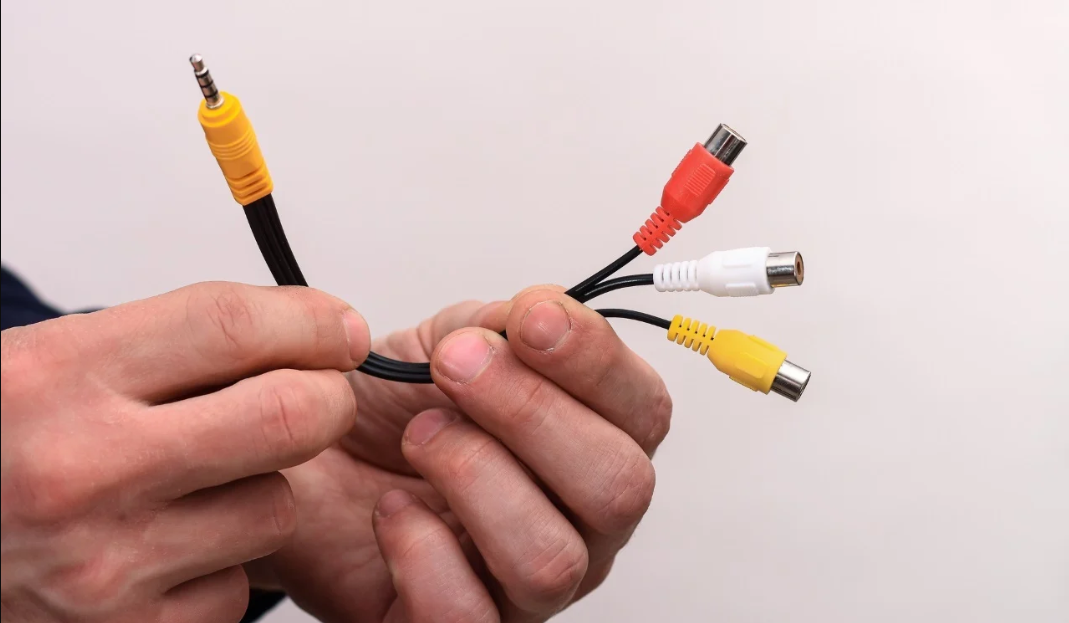
IV. Using Composite Cables
If your VCR has composite output (usually color-coded yellow, red, and white), and your Smart TV has a composite input, you can use composite cables. Connect the corresponding colors of the composite cable from the VCR to the TV, then select the correct input source on your Smart TV.
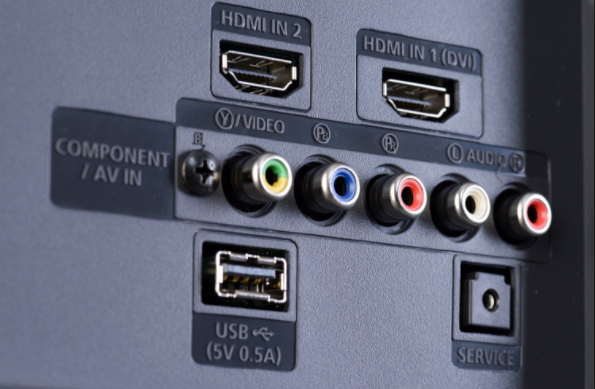
V. Employing Component Cables
For better video quality than composite cables, if your VCR and Smart TV both have component jacks (usually color-coded red, green, and blue for video, and red and white for audio), use component cables. Connect the cables appropriately, and don't forget to select the correct input source on your Smart TV.
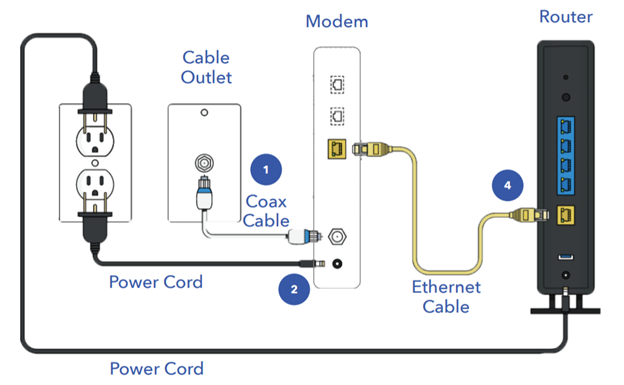
VI. Setting Up Coaxial Connection
If your VCR and Smart TV lack the aforementioned options, you can use a coaxial cable. Attach one end of the coaxial cable to the VCR's "RF Out" or "Out to TV" jack and the other end to the TV's coaxial input. Use your TV remote to scan for channels, and you should see the VCR's output.
Setting Up Coaxial Connection
VII. Tuning the VCR
Once the physical connection is established, you may need to tune your VCR to ensure optimal playback. Access the VCR's menu and set it to the correct channel (often channel 3 or 4) that matches the channel set on your Smart TV for external devices.
VIII. Troubleshooting
If you encounter any issues during the setup process, don't fret! Double-check all the connections and ensure they are secure. If you're using the coaxial method, check that the TV is set to the correct channel and that the VCR is properly tuned. If using HDMI, ensure the TV input is set to the corresponding HDMI port. Refer to the user manuals of your VCR and Smart TV for specific troubleshooting tips.
IX. Conclusion
Congratulations! You've successfully connected your VCR to your Smart TV, and now you can relive those cherished memories stored on VHS tapes. We hope this step-by-step guide has made the process easy and enjoyable. Remember, technology may evolve, but the nostalgia of VCRs remains timeless. Enjoy your trip down memory lane and happy watching!