How to Wrap a Mason Jar: Creative and Practical Ideas
Mason jars are versatile containers that make for excellent gifts, whether filled with homemade jams, candles, or layered baking mixes. To make your Mason jar gift even more special, wrapping it beautifully is essential. Here’s a comprehensive guide on how to wrap a Mason jar in various creative and practical ways.
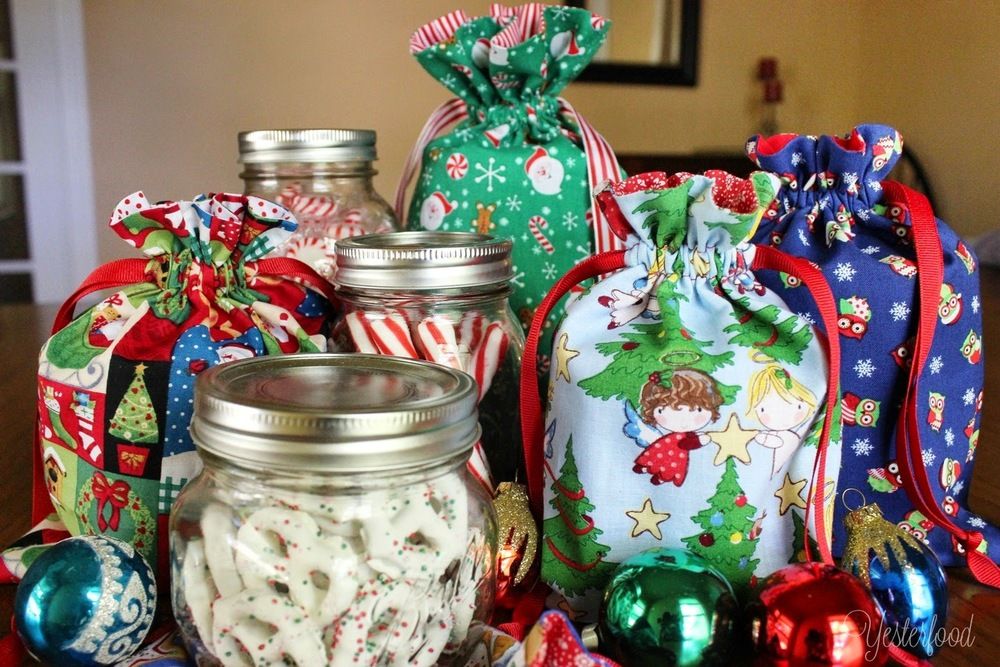
1. Basic Wrapping with Fabric
a. Choosing the Fabric
- Material: Select a piece of fabric such as burlap, cotton, or a festive holiday print.
- Size: Ensure the fabric is large enough to cover the jar completely and gather at the top.
b. Wrapping Steps
- Place the Jar: Center the Mason jar on the fabric square.
- Gather Fabric: Pull the fabric up around the jar, gathering it at the neck.
- Secure with Ribbon: Tie a ribbon or twine around the gathered fabric at the neck of the jar to secure it.
- Finishing Touches: Fluff the fabric around the top and trim any excess for a neat appearance.
how to wrap a mason jar
2. Using Cellophane for a Professional Look
a. Materials Needed
- Cellophane Sheets: Choose clear or colored cellophane.
- Ribbon or Twine: Select a complementary color to match the occasion.
- Scissors: To trim excess cellophane.
b. Wrapping Steps
- Position the Jar: Place the Mason jar in the center of the cellophane sheet.
- Gather Cellophane: Bring the cellophane up around the jar, ensuring it is even on all sides.
- Secure with Ribbon: Tie a ribbon or twine around the neck of the jar to hold the cellophane in place.
- Trim Excess: Cut off any extra cellophane for a clean look.
3. Decorative Paper Wrapping
a. Materials Needed
- Decorative Paper: Use kraft paper, scrapbook paper, or wrapping paper.
- Tape or Glue: To secure the paper.
- Ribbon or Twine: For additional decoration.
b. Wrapping Steps
- Measure and Cut: Cut a piece of decorative paper to wrap around the Mason jar.
- Wrap the Jar: Secure the paper around the jar with tape or glue, ensuring it fits snugly.
- Add Ribbon: Tie a ribbon or twine around the neck of the jar for a finishing touch.
- Labeling: Optionally, add a gift tag or label to personalize your gift.

how to wrap a mason jar
4. Custom Gift Bags
a. Materials Needed
- Gift Bag: Choose a bag that fits the Mason jar.
- Tissue Paper: To add cushioning and decoration.
- Ribbon: For additional flair.
b. Wrapping Steps
- Prepare the Bag: Place a few sheets of tissue paper in the bottom of the gift bag.
- Insert the Jar: Place the Mason jar into the bag.
- Add More Tissue Paper: Surround the jar with more tissue paper for cushioning and to hide the jar.
- Tie with Ribbon: If the bag has handles, tie a ribbon around them for a festive touch.
5. Creative Add-ons
a. Personalized Tags
- Create Tags: Make custom tags with the recipient’s name or a special message.
- Attach Tags: Secure the tags with ribbon or twine around the neck of the jar.
b. Natural Elements
- Incorporate Nature: Add sprigs of holly, pine cones, or dried flowers for a rustic touch.
- Secure Elements: Use hot glue or tuck the elements under the ribbon or twine.
c. Themed Decorations
- Seasonal Themes: Use themed decorations such as mini ornaments for Christmas or small pumpkins for Thanksgiving.
- Secure Decorations: Attach these decorations with hot glue or ribbon.
Conclusion
Wrapping a Mason jar can be as simple or as elaborate as you like, depending on the occasion and your creativity. Whether you choose to use fabric, cellophane, decorative paper, or a custom gift bag, the key is to make your gift look thoughtful and appealing. Adding personal touches like tags, natural elements, or themed decorations can elevate your presentation and make your Mason jar gift truly memorable. By following these steps, you’ll ensure that your Mason jar gift is beautifully wrapped and ready to impress.