Crafting a Buzzworthy Bee Cake: Step-by-Step Guide
If you're looking to create a show-stopping cake that's as adorable as it is delicious, a bee cake is the perfect choice. Whether you're celebrating a birthday, baby shower, or just want to impress your guests, this bee-themed cake is sure to create a buzz! In this comprehensive guide, we'll walk you through the step-by-step process of making your very own bee cake that will be the talk of the town.
1. Gather Your Ingredients
Before you begin, make sure you have all the necessary ingredients on hand. Here's what you'll need:
- Cake mix or ingredients for your favorite cake recipe
- Buttercream frosting (yellow, black, and white)
- Fondant (yellow and black)
- Edible black food coloring gel
- Edible yellow food coloring gel
- Round cake pans (6-inch and 8-inch)
- Cake decorating tools (piping bags, tips, offset spatula)
- Bee-shaped cookie cutter (optional)

how to make a bee cake
2. Bake Your Cakes
Start by baking your cake layers according to your chosen recipe or using a cake mix. You'll need one 8-inch round cake layer and one 6-inch round cake layer. Allow the cakes to cool completely before assembling your cake.
3. Prepare Your Frosting
While your cakes are cooling, prepare your buttercream frosting. Divide the frosting into three bowls and tint one bowl yellow, one bowl black, and leave the remaining bowl white.
4. Level and Stack Your Cakes
Once your cakes are cooled, level them using a serrated knife to create flat tops. Place a small amount of frosting on a cake board or serving platter to secure your 8-inch cake layer. Stack the 6-inch cake layer on top, securing it with a bit of frosting. This will create the bee's body and head.
5. Crumb Coat Your Cake
Apply a thin layer of yellow buttercream frosting to the entire cake to seal in any crumbs. This is called a crumb coat. Chill the cake in the refrigerator for about 30 minutes to allow the crumb coat to set.
how to make a bee cake
6. Frost Your Cake
Once the crumb coat is set, apply a thicker layer of yellow buttercream frosting to the entire cake, smoothing it out with an offset spatula for a clean finish.
7. Decorate with Fondant
Roll out yellow fondant to about 1/8 inch thick. Cut out large circles using a cookie cutter or a round template to create the bee's wings. Roll out black fondant and cut out thin strips to create the bee's stripes. Attach the wings and stripes to the cake using a small amount of water or edible glue.
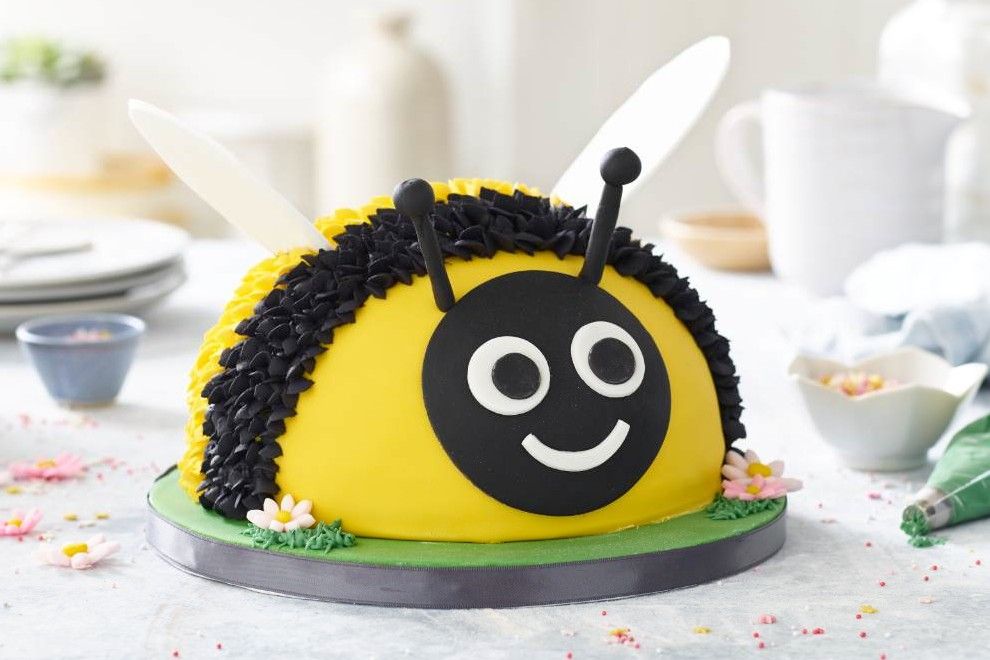
8. Add Details
Using black buttercream frosting and a piping bag fitted with a small round tip, pipe on the bee's eyes, mouth, and stripes. Use white buttercream frosting to add highlights to the eyes and mouth for a more realistic look.
9. Finish with Details
If desired, use a small amount of black fondant to shape antennae for the bee. Attach them to the top of the bee's head using a toothpick or edible glue.
10. Enjoy Your Bee-autiful Creation!
Once you've finished decorating your bee cake, step back and admire your handiwork. Slice into your masterpiece and enjoy the sweet rewards of your hard work!
Conclusion
Creating a bee cake is a fun and rewarding baking project that's sure to impress. With a little creativity and attention to detail, you can craft a buzzworthy cake that will be the highlight of any celebration. Follow these step-by-step instructions, and let your imagination take flight as you bring this adorable bee cake to life!