DIY LED Diffuser: Shedding Light on Custom Lighting Solutions
In the realm of DIY projects, crafting your LED diffuser opens up a world of creativity and customization for your lighting needs. Whether you're enhancing the ambiance of your living space or adding a touch of flair to your photography setup, a DIY LED diffuser can be both functional and visually appealing. Let's explore the ins and outs of creating your LED diffuser in this comprehensive guide.
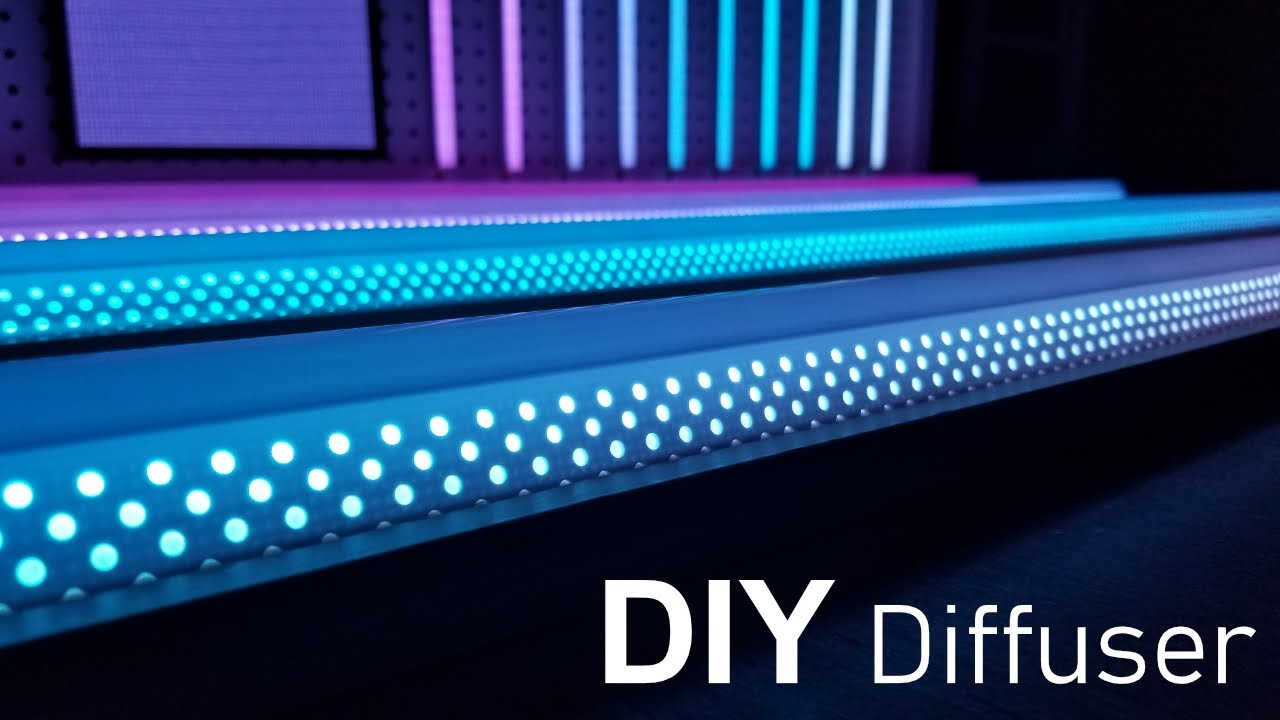
1. Understanding LED Diffusers
LED diffusers are materials or structures placed over LED lights to scatter or soften the light output. They help reduce glare, eliminate harsh shadows, and create a more uniform illumination. DIY LED diffusers offer flexibility in design, allowing you to tailor the light diffusion to your specific requirements.

led diffuser diy
2. Materials Needed for DIY LED Diffuser
-
Acrylic Sheets: Transparent or translucent acrylic sheets serve as the primary material for the diffuser. They come in various thicknesses and can be easily cut to size.
-
Sandpaper: To smoothen the edges of the acrylic sheets after cutting.
-
Adhesive: Use adhesive tapes or glue to assemble the diffuser components.
-
Optional Decorative Elements: Consider incorporating decorative elements such as frosted films, patterned papers, or colored gels to customize the appearance of your diffuser.
3. Steps to Create DIY LED Diffuser
-
Measure and Cut Acrylic Sheets: Determine the dimensions of your LED panel or light source and cut the acrylic sheets accordingly. Use a fine-toothed saw or a scoring knife for precise cuts.
-
Smooth Edges: Use sandpaper to smooth out any rough edges or burrs on the acrylic sheets to ensure a clean finish.
-
Attach Decorative Elements (Optional): If desired, apply frosted films, patterned papers, or colored gels to the surface of the acrylic sheets to achieve the desired diffusion effect or aesthetic appeal.
-
Assemble the Diffuser: Use adhesive tapes or glue to attach the acrylic sheets together, forming a frame around the LED light source. Ensure the diffuser is securely fastened and free from gaps or loose edges.
-
Install the DIY LED Diffuser: Place the assembled diffuser over the LED light source, ensuring proper alignment and coverage. Secure the diffuser in place using mounting brackets or adhesive strips.
led diffuser diy
4. Benefits of DIY LED Diffusers
-
Customization: DIY LED diffusers offer limitless customization options, allowing you to tailor the light output to match your preferences and specific lighting requirements.
-
Cost-Effective: Creating your LED diffuser is often more cost-effective than purchasing pre-made diffusers, especially for larger or irregularly shaped light sources.
-
Creativity: Designing and building your LED diffuser allows you to unleash your creativity and experiment with different materials, textures, and patterns to achieve unique lighting effects.
5. Applications of DIY LED Diffusers
-
Home Lighting: Use DIY LED diffusers to soften the light in your living room, bedroom, or kitchen, creating a warm and inviting ambiance.
-
Photography and Videography: Enhance the quality of your photographs and videos by diffusing harsh lighting from LED studio lights or camera flashes, resulting in softer shadows and more flattering illumination.
-
Artistic Installations: Incorporate DIY LED diffusers into art installations, displays, or sculptures to add visual interest and dynamic lighting effects.
6. Conclusion
Crafting your DIY LED diffuser opens up a world of possibilities for creating custom lighting solutions tailored to your specific needs and preferences. By understanding the basics of LED diffusers and following simple steps, you can unleash your creativity and transform ordinary LED lights into stunning illuminated masterpieces. So why wait? Roll up your sleeves, gather your materials, and embark on your DIY LED diffuser project today!